Android 属性动画
一、ValueAnimator
ValueAnimator是值的变动,可以控制控件的一些值,从而达到变化动画的效果。
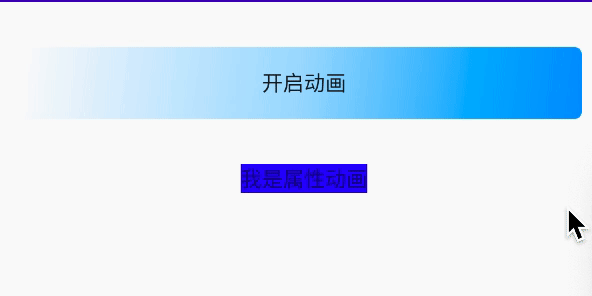
public void doAnimation() {// final ValueAnimator valueAnimatorInt = ValueAnimator.ofInt(0,400,100,555,250); //输入需要变化的值,是个变化的数组,可以有int类型和float类型 final ValueAnimator valueAnimator = ValueAnimator.ofFloat(0.0f,400.0f,100.0f,555.0f,250.0f); valueAnimator.setDuration(9000);//动画持续时间 //监听动画的变化时间,在变化中对控件进行操作,也可以通过handle来做一些有趣的事情 valueAnimator.addUpdateListener(new ValueAnimator.AnimatorUpdateListener() { @Override public void onAnimationUpdate(ValueAnimator animation) { //获得变化的值 Float curValueFloat = (Float) valueAnimator.getAnimatedValue(); //设置为整型 int curValue = curValueFloat.intValue(); //改变控件的位置,layout对应的是控件的位置 valueTV.layout(curValue, curValue, curValue + imageView.getWidth(), curValue + imageView.getHeight()); } }); valueAnimator.start(); }监听器三个
//监听1 valueAnimator.addPauseListener(new Animator.AnimatorPauseListener() { @Override public void onAnimationPause(Animator animation) { //暂停 } @Override public void onAnimationResume(Animator animation) { //运行 } }); //监听2 valueAnimator.addListener(new Animator.AnimatorListener() { @Override public void onAnimationStart(Animator animation) { //开始 } @Override public void onAnimationEnd(Animator animation) { //结束 } @Override public void onAnimationCancel(Animator animation) { //取消 } @Override public void onAnimationRepeat(Animator animation) { //循环一次 } }); //监听3 valueAnimator.addUpdateListener(new ValueAnimator.AnimatorUpdateListener() { @Override public void onAnimationUpdate(ValueAnimator animation) { //数值更新 } });移除监听器
当移除监听器时,正在执行的动画不会受到影响,但是之后再执行动画,动画的监听效果将不会再呈现。
/** * 移除AnimatorUpdateListener */ void removeUpdateListener(AnimatorUpdateListener listener); void removeAllUpdateListeners(); /** * 移除AnimatorListener */ void removeListener(AnimatorListener listener); void removeAllListeners();不常用函数
/** * 延时多久时间开始,单位是毫秒 */public void setStartDelay(long startDelay) /** * 完全克隆一个ValueAnimator实例,包括它所有的设置以及所有对监听器代码的处理 */public ValueAnimator clone()常用函数
/** * 设置动画时长,单位是毫秒 */ValueAnimator setDuration(long duration) /** * 获取ValueAnimator在运动时,当前运动点的值 */Object getAnimatedValue();/** * 开始动画 */void start() /** * 设置循环次数,设置为INFINITE表示无限循环 */void setRepeatCount(int value) /** * 设置循环模式 * value取值有RESTART,REVERSE, */void setRepeatMode(int value) /** * 取消动画 */void cancel()效果:

二、自定义插值器
1.插值器的理解
首先看看自动自定义的插值器
匀速插值器:
看看继承关系:LinearInterpolator---继承--->BaseInterpolator---继承--->Interpolator---实现-->TimeInterpolator
最后看看TimeInterpolator都写了啥:
只定义了一个getInterpolation(float input)方法。
package android.animation;/** * A time interpolator defines the rate of change of an animation. This allows animations * to have non-linear motion, such as acceleration and deceleration. */public interface TimeInterpolator { /** * Maps a value representing the elapsed fraction of an animation to a value that represents * the interpolated fraction. This interpolated value is then multiplied by the change in * value of an animation to derive the animated value at the current elapsed animation time. * * @param input A value between 0 and 1.0 indicating our current point * in the animation where 0 represents the start and 1.0 represents * the end * @return The interpolation value. This value can be more than 1.0 for * interpolators which overshoot their targets, or less than 0 for * interpolators that undershoot their targets. */ float getInterpolation(float input);}LinearInterpolator的定义
public class LinearInterpolator extends BaseInterpolator implements NativeInterpolatorFactory { public LinearInterpolator() { } public LinearInterpolator(Context context, AttributeSet attrs) { } public float getInterpolation(float input) { return input; //数值进度与时间同步 } /** @hide */ @Override public long createNativeInterpolator() { return NativeInterpolatorFactoryHelper.createLinearInterpolator(); }}AccelerateInterpolator开始慢,后面一直加速插值器,也叫幂函数插值器,核心方法
public float getInterpolation(float input) { if (mFactor == 1.0f) { return input * input; } else { //返回的是时间的次幂数,比如 input=3,mDoubleFactor=2, //那么返回的就是,3的2次方,就是9 //所以会按照几何倍增,这是一个幂函数 return (float)Math.pow(input, mDoubleFactor); } }所有的速度都离不开这个方法:getInterpolation
而最为关键的就是input这个数字。以下是经典解释:
input参数代表了当前动画的进度,而返回值则代表了当前动画的数值进度。
上面的匀速,返回的就是时间的值,所以,动画进度和动画的数值持平。
幂函数的时候,随着动画进度的增加,动画的数值进度也就越来越大,从而一直加速。
input的取值范围是0~1之间,返回值可以超过1,也可以小于0,超过1表示已经超过目标位置,小于0表示远离初始位置。
简单的公式就是
y= -> x
y代表返回的值,也就是动画需要的数值进度,x代表时间进度,->则是通过一些数学手段,来得到想要的y值。
- 当一些动画定义这些插值器的时候,返回的数值进度越大,速度越快。比如你在匀速运动的时候,时间进度是0.5s,数值进度也是0.5,那就是匀速运动。
2.定义一个简单的插值器
我们用数学中的定义来做一个插值器。
y=1-x
把进度反过来,当进度传入0的时候,数值进度已经在目标位置了。当传入1时,数值则在刚开始的位置。
class FiveInterpolator implements TimeInterpolator { @Override public float getInterpolation(float input) { return 1-input; } }valueAnimator.setInterpolator(``new ``FiveInterpolator())``;
一个简单的自定义插值器就完成了。
三、Evaluator
- Evaluator是数值转换器,就是将数值进度转化为具体的数值。
- 就是0~400的数值变换,当数值进度是50%的时候,那通过Evaluator来转换,就变成了200
- oflnt()函 数对应 Evauator 类名为 IntEvauaor ,而 ofFloat()函数对应的 Evauator 类名为 FloatEvaluator
自定义数值转换器:
//自定义数值转换器 class MyFloatEvaluator implements TypeEvaluator<Float>{ /** * @param fraction 代表数值进度的值,就是上面getInterpolation()的返回值 * @param startValue 代表ofFloat(Float startValue,Float endValue) * @param endValue * */ @Override public Float evaluate(float fraction, Float startValue, Float endValue) { //初始值 Float startFloat=startValue; //当前值=初始值+总值*进度 Float inputValue=startFloat+(endValue-startFloat)*fraction; return inputValue; } }使用:
valueAnimator.setEvaluator(new MyFloatEvaluator());所以可以通过插值器和数值转化器来改变控件的数值变化
valueAnimator.setInterpolator(new FiveInterpolator());valueAnimator.setEvaluator(new MyFloatEvaluator());四、ArgbEvaluator
ArgbEvaluator可以把颜色转换过渡。
具体实现:
//颜色的数值变换 public void doColorAnimation(){ ValueAnimator valueAnimator=ValueAnimator.ofInt(0xffffff00,0xff0000ff); valueAnimator.setEvaluator(new ArgbEvaluator()); valueAnimator.setDuration(3000); valueAnimator.addUpdateListener(new ValueAnimator.AnimatorUpdateListener() { @Override public void onAnimationUpdate(ValueAnimator animation) { int curValue=(int)animation.getAnimatedValue(); valueTV.setBackgroundColor(curValue); } }); valueAnimator.start(); }效果:
颜色必须包含ARGB四个值。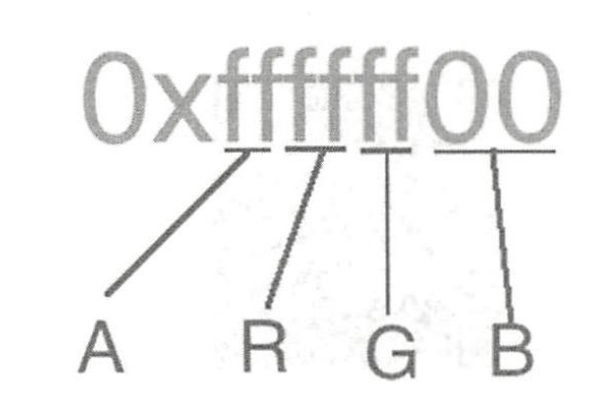
五、ValueAnimation-ofObject
首先看看这个方法是如何传值的。
public static ValueAnimator ofObject(TypeEvaluator evaluator, Object... values) { ValueAnimator anim = new ValueAnimator(); anim.setObjectValues(values); anim.setEvaluator(evaluator); return anim; }TypeEvaluator evaluator需要传入自定义的数值转换器Object... values 可变长参数
实例
实现一个字母从A到Z的过程
public void doObjectValue() { ValueAnimator valueAnimator = ValueAnimator.ofObject(new CharInterpolator(), new Character('A'), new Character('Z')); valueAnimator.addUpdateListener(new ValueAnimator.AnimatorUpdateListener() { @Override public void onAnimationUpdate(ValueAnimator animation) { char str = (char) animation.getAnimatedValue(); valueTV.setText(String.valueOf(str)); } }); valueAnimator.setDuration(7000); valueAnimator.setInterpolator(new AccelerateInterpolator()); valueAnimator.start(); } class CharInterpolator implements TypeEvaluator<Character> { @Override public Character evaluate(float fraction, Character startValue, Character endValue) { int startInt = (int) startValue; //ASCII转换 A代表56 以此递增 int endInt = (int) endValue; int curInt = (int) (startInt + fraction * (endInt - startInt)); char result = (char) curInt; return result; } }效果:

六、ObjectAnimator
ObjeceAnimation--继承--->ValueAnimation
与控件之间相关联,从监听动画中解放出来。
先看看这个方法:
ObjectAnimator ofFloat(Object target, String propertyName, float... values)具体使用
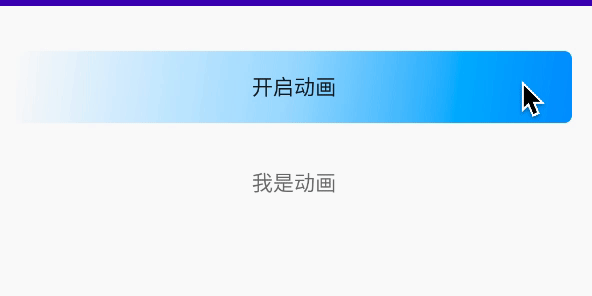
public void doObjectAnimationByAlpha(){ ObjectAnimator objectAnimator=ObjectAnimator.ofFloat(valueTV,"alpha",1,0,1); objectAnimator.setDuration(6000); objectAnimator.start(); }Object target要控制的控件String propertyName要改变的动画效果float... values传入的具体变化值
具体效果就是跟视图动画中设置的动画是一样的效果,透明度从1到0再到1.
"alpha"中,是对应view中的setAlpha()方法,后面的可变成参数就是可以传入具体是变换数值。
看看view中有多少个set函数:
透明度:alpha
setAlpha(@FloatRange(from=0.0, to=1.0) float alpha) //透明度旋转角度:rotation,rotationX,rotationY
setRotation(float rotation) //围绕Z轴旋转,Z轴指的是垂直屏幕的方向setRotationX(float rotationX) //围绕X轴旋转setRotationY(float rotationY) //围绕Y轴旋转平移:translationX,translationY
setTranslationX(float translationX) //X轴屏幕,右为正方向,当前控件为原点setTranslationY(float translationY)缩放:scaleX,scaleY
setScaleX(float scaleX) //X轴缩放setScaleY(float scaleY)看看旋转是三个效果:
public void doObjectAnimationByAlpha(){ ObjectAnimator objectAnimator=ObjectAnimator.ofFloat(valueTV,"rotationY",360); objectAnimator.setDuration(6000); objectAnimator.start(); }Z轴:

X轴:
Y轴:
七、自定义ObjectAnimator
因为ObjectAnimator是通过set来反射实现的,所以自己也可以通过这样的操作来实现自己view的set函数,从而实现简单的动画效果。
1.自定义view的set函数
FallingBallImageView.java
public class FallingBallImageView extends ImageView { public FallingBallImageView(Context context, @Nullable AttributeSet attrs) { super(context, attrs); } public void setFallingPos(Point pos){ layout(pos.x,pos.y,pos.x+getWidth(),pos.y+getHeight()); }}布局使用
<com.lanjiabin.systemtest.anim.FallingBallImageView android:id="@+id/imageBall" android:layout_width="wrap_content" android:layout_height="wrap_content" android:layout_gravity="center" android:layout_marginTop="30dp" android:background="@drawable/shape" android:layout_marginBottom="25dp" />set函数的名字是setFallingPos,所以在传递反射函数名字的时候,应该是fallingPos或者FallingPos,必须是这两个名字中其中一个的格式,否则就不会正确反射。参数类型是Point,所以使用函数是ofObject()。
2.自定义Evaluator
class DivEvaluator implements TypeEvaluator<Point> { Point point = new Point(); @Override public Point evaluate(float fraction, Point startValue, Point endValue) { point.x = (int) (startValue.x + (endValue.x - startValue.x) * fraction); if (fraction * 2 <= 1) { point.y = (int) (startValue.y + (endValue.y - startValue.y) * fraction); } else { point.y = endValue.y; } return point; } }3.实现最终反射调用
public void doObjectAnimationByDiv() { ObjectAnimator objectAnimator=ObjectAnimator .ofObject( ballImageView, //自定义view的小球 "FallingPos", //反射名字,FallingPos或者fallingPos都可以 new DivEvaluator(), //自定义转换器 new Point(0,0), //起始坐标 new Point(300,300)); //目标坐标 objectAnimator.setDuration(4000); //动画时长 objectAnimator.start(); }4.效果
5.get函数
当我们在上述函数的时候,ofObject()传的都是可变长的参数,也就是两个参数以上,当我们只传递一个参数的时候,这个参数只是目标参数,没有初始参数,系统就会默认调用系统自带的get方法,来获得初始值。当没有这个get方法的时候,就会报错,以至于崩溃。
所以想传递一个参数,就需要自定义get()方法,返回的,就是初始值。对应名字也和set的名字类似。setFallingPos(Point pos)的名字就是getFallingPos(Point pos)
在自定义view中加入get方法:返回控件的初始Point
public Point getFallingPos() { int[] location = new int[2]; this.getLocationOnScreen(location); return new Point(location[0], location[1]); }八、AnimatorSet
1.AnimatorSet理解和使用
AnimatorSet组合动画,对ValueAnimation和ObjectAnimation都有一样的效果。
有两个播放方法:只管播放的时间,不管动画个体是如何操作的,不管动画的执行时间,循环次数等。playSequentially()
是顺序播放,当前一个动画播放完毕以后,才会执行下一个动画。当前一个动画是无限循环时,后一个动画也就无法播放。有两个构造方法。
playSequentially(Animator... items)playSequentially(List<Animator> items)playTogether()
是一起播放,同一个时间内,在列表中所有动画同一时间启动。
playTogether(Animator... items)playTogether(Collection<Animator> items)具体实例,有一个缩放动画和位移动画,分别实现同时播放和顺序播放。
public void doAnimationSet() { //缩放 ObjectAnimator objectAnimatorScaleY = ObjectAnimator.ofFloat(ballImageView, "scaleY", 0.0f, 1.6f, 1.0f); //平移 ObjectAnimator objectAnimatorTranslationX = ObjectAnimator.ofFloat(ballImageView, "translationX", 400); //组合动画 AnimatorSet animator = new AnimatorSet(); //每个动画的播放时间 animator.setDuration(3000); //顺序播放 animator.playSequentially(objectAnimatorScaleY, objectAnimatorTranslationX); //一起播放 animator.playTogether(objectAnimatorScaleY, objectAnimatorTranslationX); animator.start(); }同时播放:动画效果同时体现出来,缩放和位移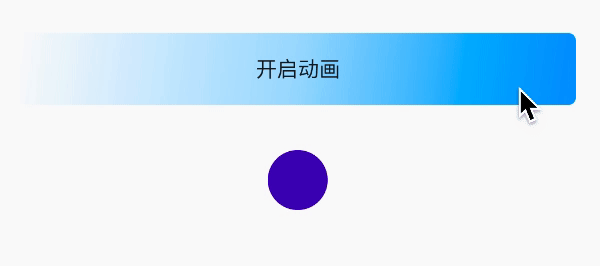
顺序播放:先缩放完毕再位移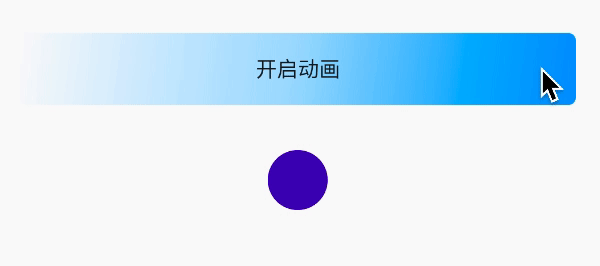
2.AnimatorSet.Builder
//组合动画 AnimatorSet animator = new AnimatorSet(); //目标动画 AnimatorSet.Builder builder=animator.play(objectAnimatorScaleY); //执行目标动画后再执行该动画 builder.after(objectAnimatorScaleY); //执行该动画后再执行目标动画 builder.before(objectAnimatorScaleY); //和目标动画一起播放 builder.with(objectAnimatorScaleY); //延迟时间执行目标动画 builder.after(3000); //串行方式 AnimatorSet animator = new AnimatorSet(); AnimatorSet.Builder builder=animator .play(objectAnimatorScaleY) .after(objectAnimatorScaleY) .before(objectAnimatorScaleY); //如果AnimatorSet设置了动画时长,循环次数等,都以AnimatorSet为准,单个设置不起作用。 //每个动画的播放时间 animator.setDuration(3000); //所有的动画都集中于这个控件上,其它的不起作用 animator.setTarget(ballImageView);九、实例-卫星菜单
1.实现原理
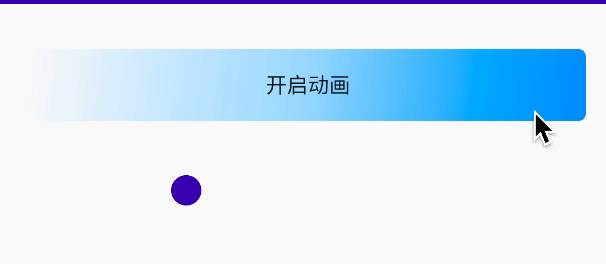
实现一个放射卫星的效果,点击一下,放射出菜单,再点击一下,收回菜单。
原理就是,将所有的菜单重叠在一起,点击最上面的菜单,按照不同的角度,实现位移,缩放,透明度的效果,将下面的菜单都位移出去。看看位移的计算方式,每个菜单,与主菜单都形成了直角形式,水平X轴的位移和Y轴的水平位移都可以计算出来。 就是从主菜单,位移到不同位置的X轴和Y轴。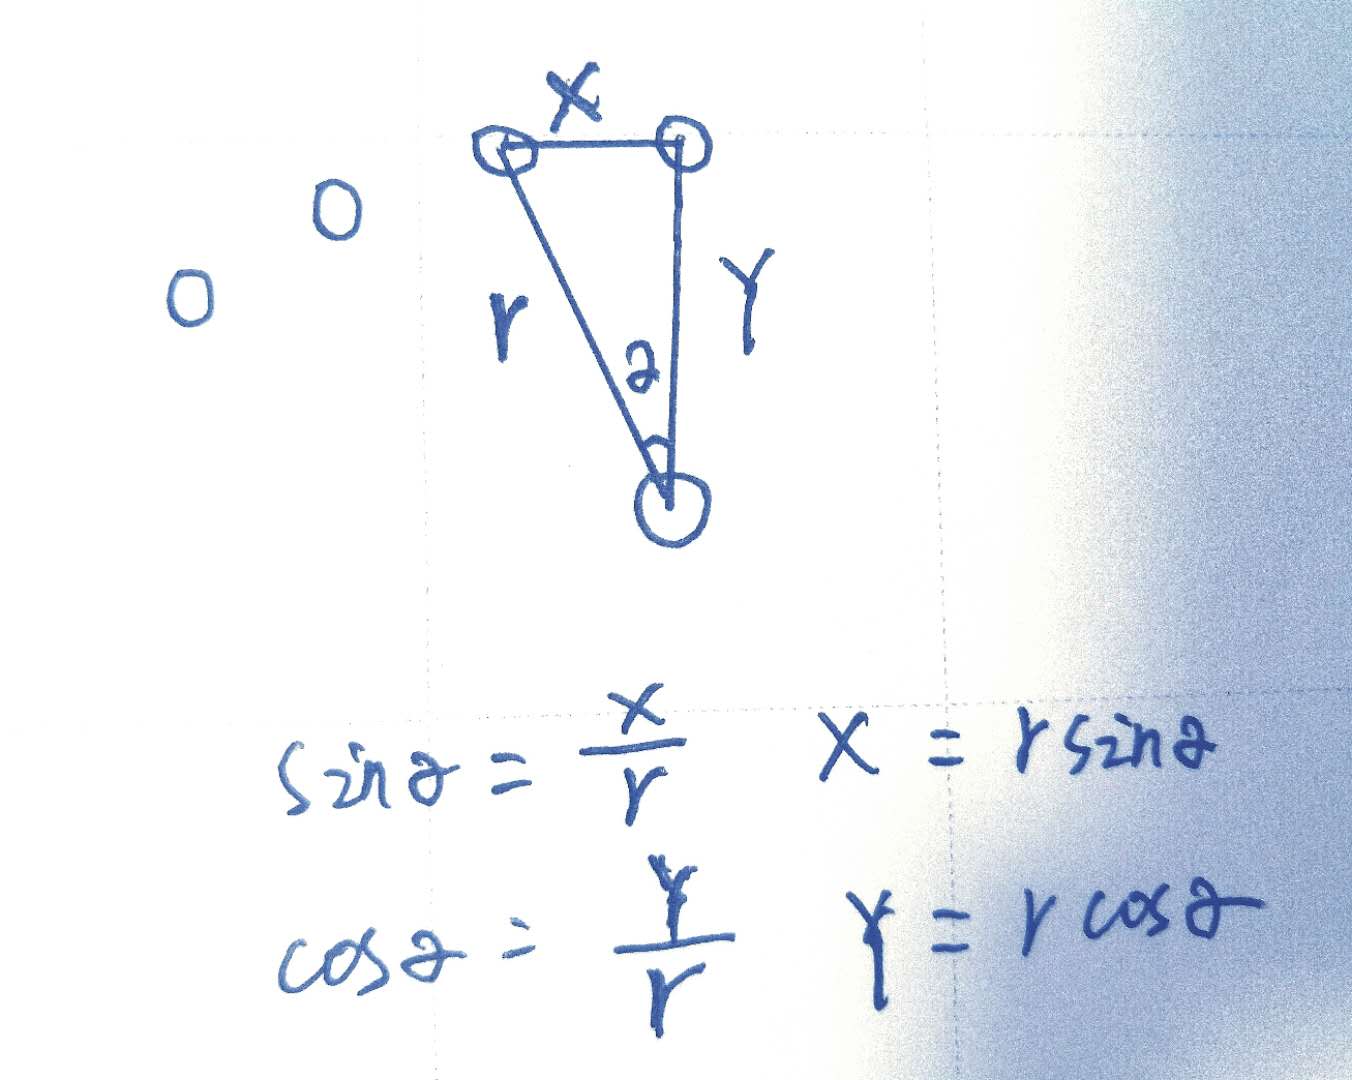
2.布局
布局非常简单,全部控件叠加在一起,而且子菜单的属性全部一致,省略了一些重复的空间。
<?3.java代码
核心思想就是,添加要控制的子菜单,开启动画方法,关闭动画方法。
public class ExampleActivity extends BaseActivity { private boolean mIsMenuOpen = false; private Button mMainBtn, mRockBtn, mAirBtn, mTrainBtn, mCarBtn, mMotorbikeBtn, mBicycleBtn, mWalkBtn; List<Button> mBtnArray; @Override protected void onCreate(Bundle savedInstanceState) { super.onCreate(savedInstanceState); initView(); OnClick(); } public void initView() { setContentView(R.layout.activity_example); mMainBtn = findViewById(R.id.mainBtn); mRockBtn = findViewById(R.id.rockBtn); mAirBtn = findViewById(R.id.airBtn); mTrainBtn = findViewById(R.id.trainBtn); mCarBtn = findViewById(R.id.carBtn); mMotorbikeBtn = findViewById(R.id.motorbikeBtn); mBicycleBtn = findViewById(R.id.bicycleBtn); mWalkBtn = findViewById(R.id.walkBtn); //添加子菜单 mBtnArray = new ArrayList<Button>(); mBtnArray.add(mRockBtn); mBtnArray.add(mAirBtn); mBtnArray.add(mTrainBtn); mBtnArray.add(mCarBtn); mBtnArray.add(mMotorbikeBtn); mBtnArray.add(mBicycleBtn); mBtnArray.add(mWalkBtn); } public void OnClick() { mMainBtn.setOnClickListener(new View.OnClickListener() { @Override public void onClick(View v) { switchAnimation(); } }); mRockBtn.setOnClickListener(new View.OnClickListener() { @Override public void onClick(View v) { Toast.makeText(ExampleActivity.this, "你选择了火箭出行!", Toast.LENGTH_SHORT).show(); } }); } //开关 public void switchAnimation() { if (!mIsMenuOpen) { mIsMenuOpen = true; for (int i = 0; i < mBtnArray.size(); i++) { doAnimationOpen(mBtnArray.get(i), i, mBtnArray.size(), 500); } } else { mIsMenuOpen = false; for (int i = 0; i < mBtnArray.size(); i++) { doAnimationClose(mBtnArray.get(i), i, mBtnArray.size(), 500); } } } /** * 开启动画/展开菜单 * @param view 要控制的控件/子菜单 * @param index 要控制控件的顺序 * @param total 子菜单的总数 * @param radius 主菜单到子菜单的距离/半径 * */ private void doAnimationOpen(View view, int index, int total, int radius) { //显示菜单 if (view.getVisibility() != View.VISIBLE) { view.setVisibility(View.VISIBLE); } //计算每个菜单的角度,toRadians()将度数转换为弧度 //七个子菜单,有六个夹角角,180/(7-1)*2 2代表第二个夹角 double degree = Math.toRadians(180) / (total - 1) * index; //X轴位移 int translationX = -(int) (radius * Math.sin(degree)); //Y轴位移 int translationY = -(int) (radius * Math.cos(degree)); AnimatorSet animatorSet = new AnimatorSet(); //动画合集 animatorSet.playTogether( //从原来控件的位置往X轴移动多少 ObjectAnimator.ofFloat(view, "translationX", 0, translationX), //从原来控件的位置往Y轴移动多少 ObjectAnimator.ofFloat(view, "translationY", 0, translationY), //X轴缩放 ObjectAnimator.ofFloat(view, "scaleX", 0.01f, 1f), //Y轴缩放 ObjectAnimator.ofFloat(view, "scaleY", 0.01f, 1.0f), //透明度 ObjectAnimator.ofFloat(view, "alpha", 0.01f, 1.0f) ); animatorSet.setDuration(500); animatorSet.start(); } //关闭菜单/动画 private void doAnimationClose(View view, int index, int total, int radius) { if (view.getVisibility() != View.VISIBLE) { view.setVisibility(View.VISIBLE); } double degree = Math.toRadians(180) / (total - 1) * index; int translationX = -(int) (radius * Math.sin(degree)); int translationY = -(int) (radius * Math.cos(degree)); AnimatorSet animatorSet = new AnimatorSet(); animatorSet.playTogether( ObjectAnimator.ofFloat(view, "translationX", translationX, 0), ObjectAnimator.ofFloat(view, "translationY", translationY, 0), ObjectAnimator.ofFloat(view, "scaleX", 1.0f, 0.01f), ObjectAnimator.ofFloat(view, "scaleY", 1.0f, 0.01f), ObjectAnimator.ofFloat(view, "alpha", 1.0f, 0.01f) ); animatorSet.setDuration(500); animatorSet.start(); }}3.效果
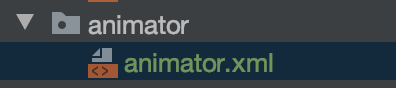
1.animator
在animator下建立animator.
<?java代码使用
ValueAnimator valueAnimator=(ValueAnimator)AnimatorInflater.loadAnimator( ExampleActivity.this, R.animator.animator); valueAnimator.addUpdateListener(new ValueAnimator.AnimatorUpdateListener() { @Override public void onAnimationUpdate(ValueAnimator animation) { int offset=(int)animation.getAnimatedValue(); mRockBtn.layout(offset,offset,mRockBtn.getWidth()+offset,mRockBtn.getHeight()+offset); } }); valueAnimator.start();2.ObjectAnimator
object_animator.
<?java代码使用
ObjectAnimator animator=(ObjectAnimator)AnimatorInflater.loadAnimator( ExampleActivity.this, R.animator.object_animator); animator.setTarget(mAirBtn); animator.start();十一、后语
包括其它的知识点,都只能说一些基础的内容,很多方法和拓展知识都没有说道,需要自己去探索,多阅读SDK源码。属性动画,有一些高级的内容,后续会持续拓展。
编程中我们会遇到多少挫折?表放弃,沙漠尽头必是绿洲。
No comments:
Post a Comment